API DOCUMENTATION
1. User registration -
By accessing or using the Website, you consent to this Privacy Policy. If you do not agree to the terms and conditions of A. User registration is required for accessing api documentation - For using any api of myxborder user should be registered. User can use the registration page of myxborder for registration.Once a user is logged in then further process will continue.
B. Link for registration - https://myxborder.com/register
2. Show developer module in menu bar - the developer module will show links of create project, create api key, test api key which will open that particular page with their functionality.
3.
Project Creation - after clicking on create project from developer module user can open page of project creation.
A. Users can create projects by using project name and authorized domain name - In project creation page there will be two fields - i. Project name, ii. Domain name. By using these two fields the form will be submitted and the project created.
One user can also make multiple projects. With the help of domain name the authorized key will be secure in future.
4. Authenticate key - after clicking on create api key now user can select its project from dropdown and then the key will be generated automatically for that project.
A. Users can create multiple keys after creating a project - for particular project user can create multiple keys using the same process.
B. For testing Authentication key user can use Swagger - for testing whether it will be working for its project or not, users can use swagger UI. In Swagger UI he needs to give an authorized key and api link which will be provided by us to him. By which he can test that the key is working or not.
Frontend
1.Shipping rate api -
A. For using shipping rate api user will send an authenticated key, destination country, currency, weight(in kg). User can also provide volumetrics which is optional. In volumetrics user need to provide height(in CM), width(in CM), depth(in CM):
B. we will check if the authenticated key is valid or not.
C. After validation we will calculate shipping rate on the basis of the user’s information.
Steps to follow
1. Hit the url https://myxborder.com/ Then click on Sign Up. Fill the form then click on sign up after that do the login.
2. Once the user is logged in, the dashboard will be shown.
3. Scroll down the side bar and hit the project showing in the developer module. And then click on create Project as shown in below screenshot.

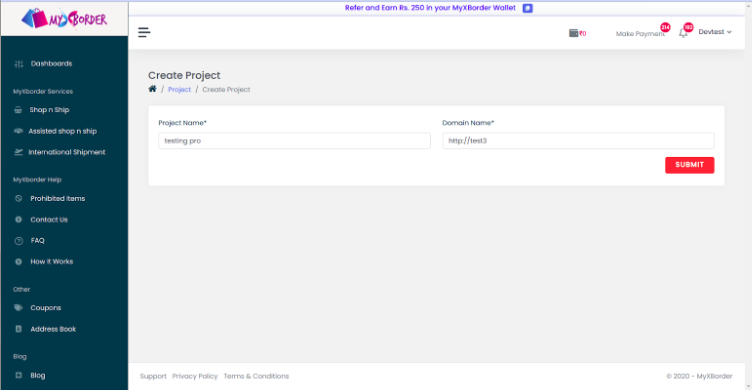
4. Give your project name and domain name in the input fields and click on submit button. As shown in below screenshot
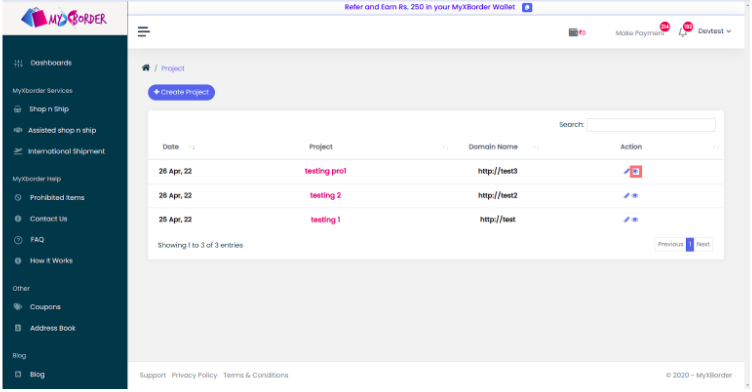
5. After submitting here you will see a list of all the projects you created.
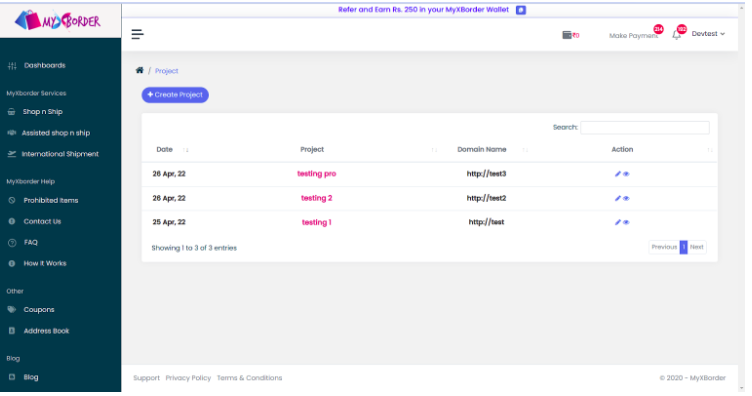
6. Click on the pencil icon showing in image 1 will open the edit page of that particular project showing in image 2 , here you can edit the both project and domain name after submitting it will again show the image 1 (list of project
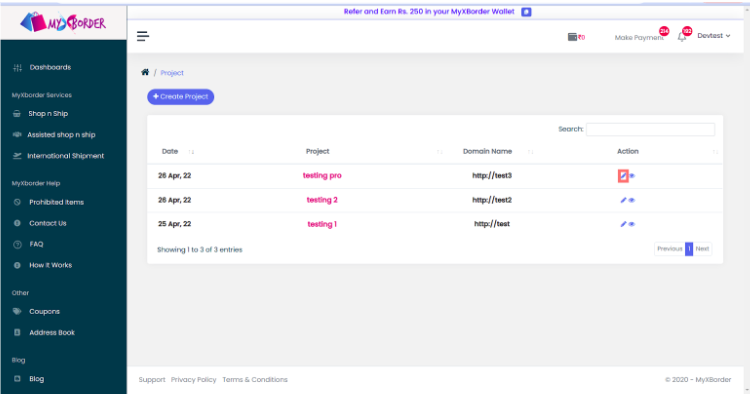
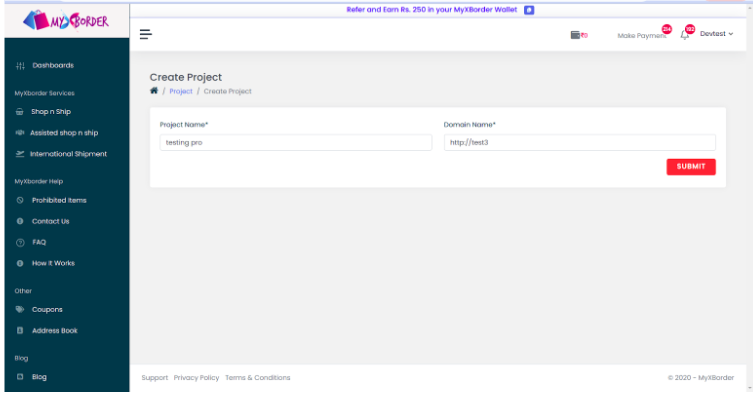
7. Now for the view of the project you created click on the eye icon showing in image 3. And the page will look like image 4.
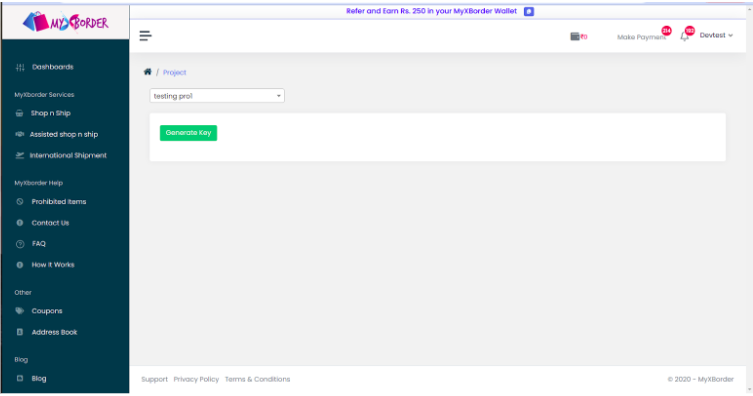
8. Selected project name is shown in the box here you can generate an authenticated api key by clicking on Generate key button showing in image 4. After clicking on the Generate key button the list of keys will be displayed here as shown below.You can create multiple keys by clicking on the Generate key button and all the keys will be shown here.
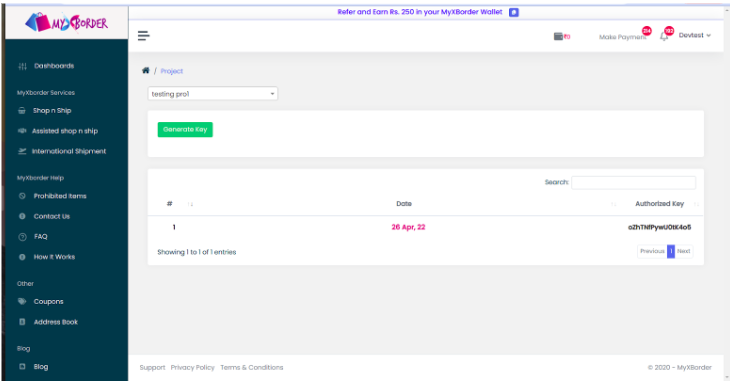
9. Click on the Generate Api key in the developer module If you want to generate an Authenticated key from here. Now you can see a list of generated keys with their project name as shown below. If you want to create a new key then click on create Authorized key button as shown below.

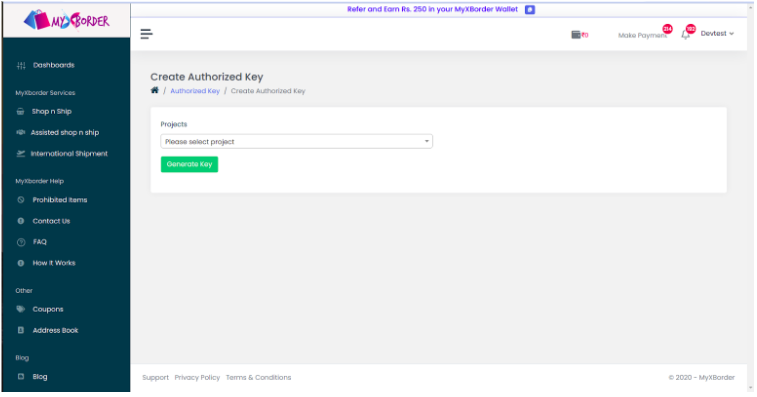
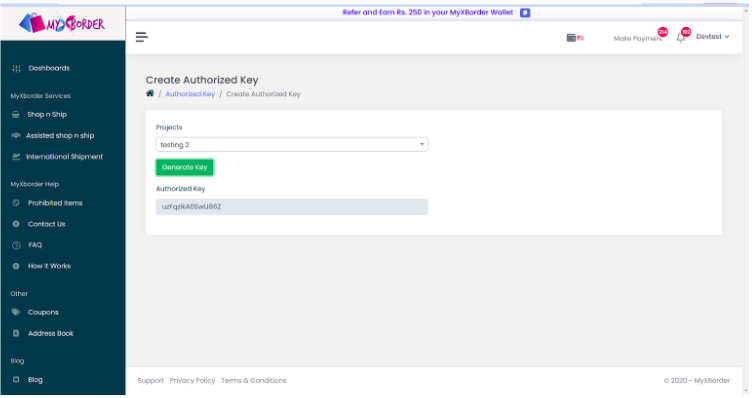
10. After clicking on the create Authorized button showing in above image the page will look like the image 5 below. You can select a project from the select box showing in image 5 then click on Generate key button your api key of that project you selected will be generated and showing in the input field below the button as shown in image 6.
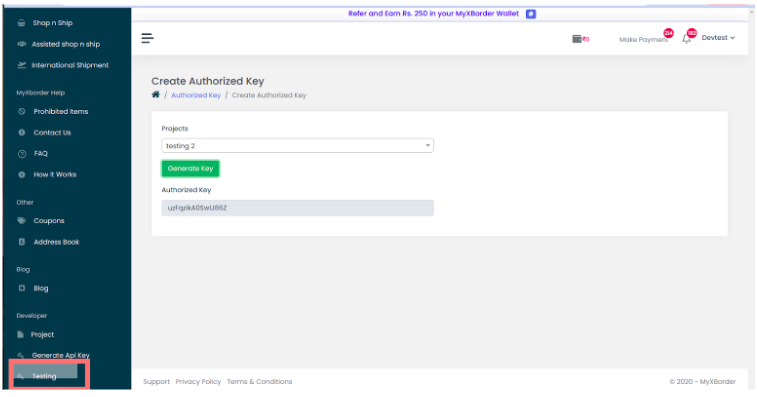
11. Now you can test this api key to see if it will work or not. By clicking on the testing button in the sidebar at the bottom showing in the image below.
12. After clicking on testing it will open an url in another tab where you can test your key with shipping rate and countries api.
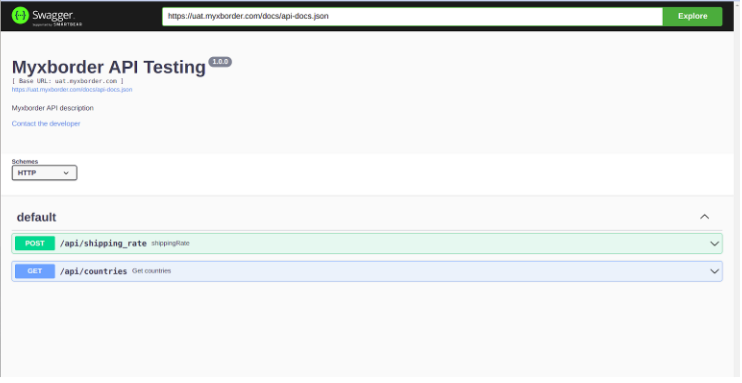
a. Select the schemes in which your URL is working. In case of uat.myxborder.com select HTTPS.
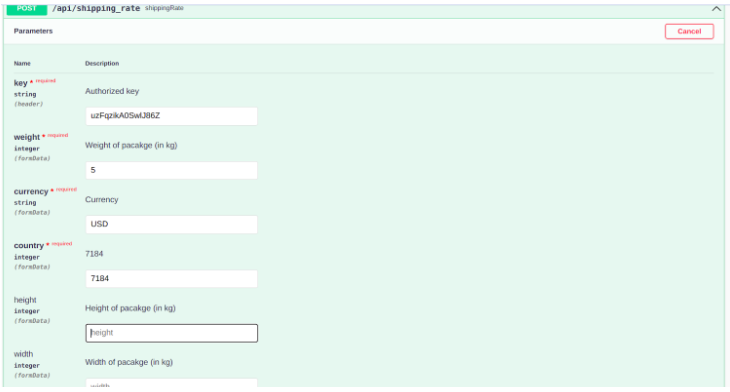
b. Click on the shipping_rate api for testing this api with your key.
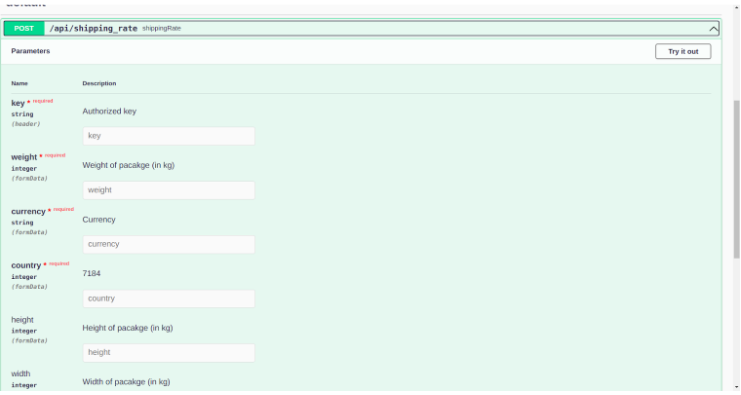
c. Click on the try it out button showing in the corner for testing this.
d. Copy your authorized key from the api list or you just created the api key copy that and paste it here in the authorized key input field. And fill all the details, weight is integer , in currency you need to fill currency code like INR, USD etc. , In the country here we will give the country code of the destination country like 7184. You can get the country code from countries api. Height, width, and depth are not required parameters, you can fill if you want then click on execute button you will get your response .
And response will be like -
{
"premium": 65,
"normal": 65,
"currency": "USD",
"country": "Australia",
"maxWidth": 5
}

13. For testing Country api click on the api and then try it out button and paste your copied authorized key then click on execute button in the response you will see array of countries with their country code and currency code.
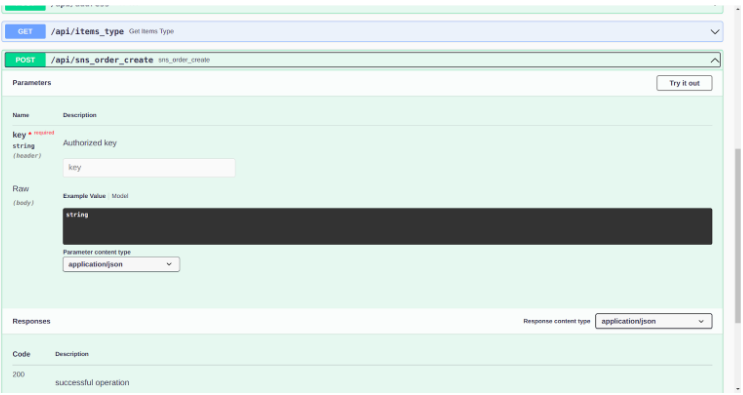
1. SNS Order Api:
A. Sns Order api looks like this click on the try it out button for using this api shown in image below.
B. Now After that clear the string and the raw will look like below.
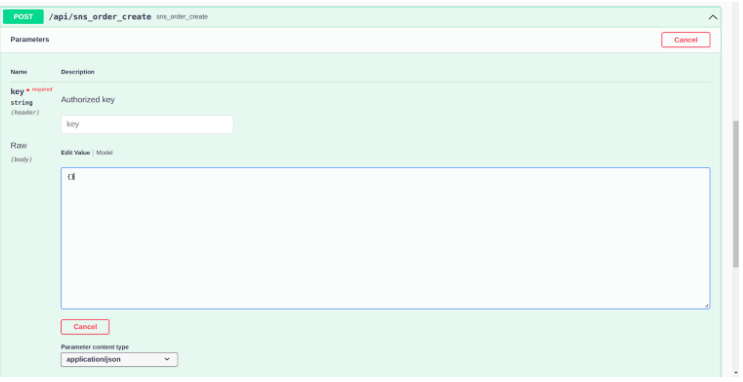
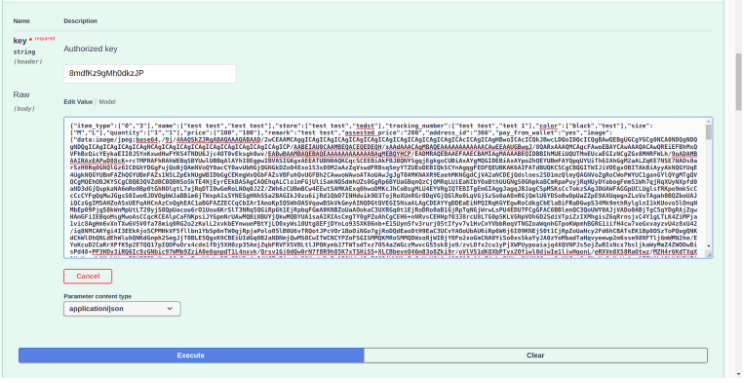
C. Now in the curly brackets give your input data
For example : SNS Test Input Data -
Image : convert the image in base64 and then paste the code
You can use this link for convert
https://codebeautify.org/image-to-base64-converter
If you use this link then upload the image and copy the code of src in HTML code
The below example will create two items in SNS order.
{
"item_type": [
"0",
"3"
],
"name": [
"test test",
"test test"
],
"store": [
"testtest",
"tedst"
],
"color": [
"black",
"test"
],
"size": [
"M",
"L"
],
"quantity": [
"1",
"1"
],
"price": [
"100",
"100"
],
"remark": "testtest",
"assested_price": "200",
"address_id": "366",
"pay_from_wallet": "yes",
"image": [
"base64 image code"
]
}
The screen will look like these :
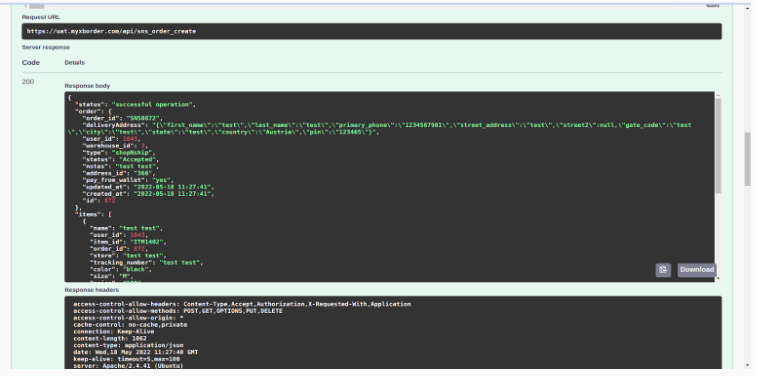
D. Hit the execute button and then your output will come. Here is the output :
{
"status": "successful operation",
"order": {
"order_id": "SNS0872",
"deliveryAddress": "{\"first_name\":\"test\",\"last_name\":\"test\",\"primary_phone\":\"1234567981\",\"street_address
\":\"test\",\"street2\":null,\"gate_code\":\"test\",\"city\":\"test\",\"state\":\"test\",\"country\":\"Austria\",\"pi
n\":\"123465\"}",
"user_id": 1043,
"warehouse_id": 2,
"type": "shopNship",
"status": "Accepted",
"notes": "test test",
"address_id": "366",
"pay_from_wallet": "yes",
"updated_at": "2022-05-18 11:27:41",
"created_at": "2022-05-18 11:27:41",
"id": 872
},
"items": [
{
"name": "test test",
"user_id": 1043,
"item_id": "ITM1402",
"order_id": 872,
"store": "test test",
"tracking_number": "test test",
"color": "black",
"size": "M",
"price": "100",
"quantity": "1",
"updated_at": "2022-05-18 11:27:41",
"created_at": "2022-05-18 11:27:41",
"id": 1402
},
{
"name": "test test",
"item_type_id": "3",
"user_id": 1043,
"item_id": "ITM1403",
"order_id": 872,
"store": "tedst",
"tracking_number": "test 1",
"color": "test",
"size": "L",
"price": "100",
"quantity": "1",
"updated_at": "2022-05-18 11:27:41",
"created_at": "2022-05-18 11:27:41",
"id": 1403
}
]
}
The screen will be look like image shown below:
2. AST Order Api:
1. Follow A and B point of SNS order.
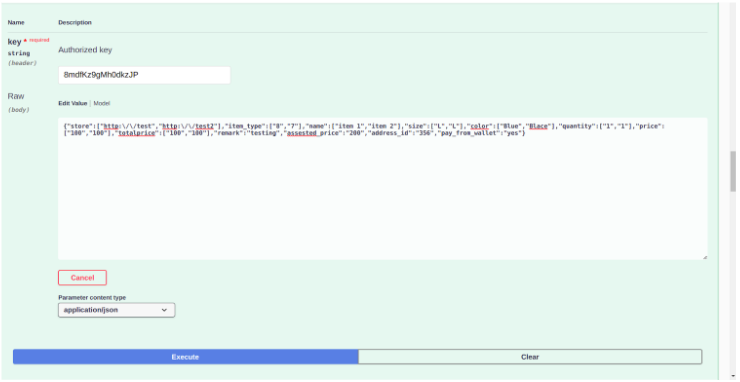
2. In curly brackets write the input fields.
For example -
{
"store": [
"http://test",
"http://test2"
],
"item_type": [
"8",
"7"
],
"name": [
"item 1",
"item2"
],
"size": [
"L",
"L"
],
"color": [
"Blue",
"Blace"
],
"quantity": [
"1",
"1"
],
"price": [
"100",
"100"
],
"totalprice": [
"100",
"100"
],
"remark": "testing",
"assested_price": "200",
"address_id": "356",
"pay_from_wallet": "yes"
}
In these remark, size and color are optional fields. If you don’t want to fill these then just give null to these fields.
The screen will be look like image showing below :
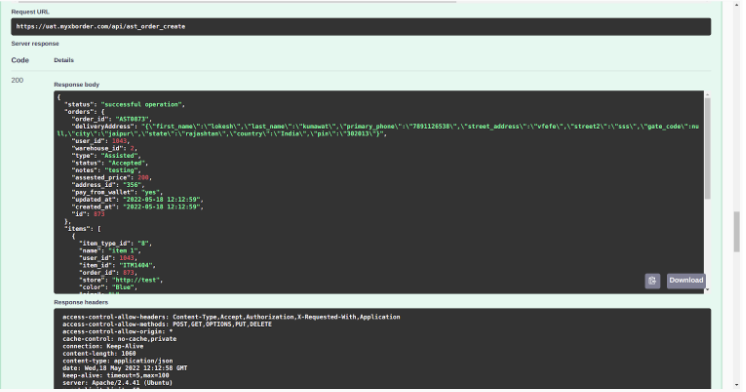
3. Hit the execute button and you will get your output which will look like this:
{
"status": "successful operation",
"orders": {
"order_id": "AST0873",
"deliveryAddress": "{\"first_name\":\"lokesh\",\"last_name\":\"kumawat\",\"primary_phone\":\"7891126538\",\"street_ad
dress\":\"vfefe\",\"street2\":\"sss\",\"gate_code\":null,\"city\":\"jaipur\",\"state\":\"rajashtan\",\"country\":\"In
dia\",\"pin\":\"302013\"}",
"user_id": 1043,
"warehouse_id": 2,
"type": "Assisted",
"status": "Accepted",
"notes": "testing",
"assested_price": 200,
"address_id": "356",
"pay_from_wallet": "yes",
"updated_at": "2022-05-18 12:12:59",
"created_at": "2022-05-18 12:12:59",
"id": 873
},
"items": [
{
"item_type_id": "8",
"name": "item 1",
"user_id": 1043,
"item_id": "ITM1404",
"order_id": 873,
"store": "http://test",
"color": "Blue",
"size": "L",
"price": "100",
"quantity": "1",
"updated_at": "2022-05-18 12:12:59",
"created_at": "2022-05-18 12:12:59",
"id": 1404
},
{
"item_type_id": "7",
"name": "item 2",
"user_id": 1043,
"item_id": "ITM1405",
"order_id": 873,
"store": "http://test2",
"color": "Blace",
"size": "L",
"price": "100",
"quantity": "1",
"updated_at": "2022-05-18 12:12:59",
"created_at": "2022-05-18 12:12:59",
"id": 1405
}
]
}
And the screen will be look like these :
3. IST Order Api:
1. Follow A and B steps of SNS order api.
2. In the Curly brackets give your input.
Prescriptioncheck, prescription and bill are optional fields but if you give input Prescriptioncheck then prescription and bill is required with them.
Example Input :
{
"contact_first_name": "test test",
"contact_last_name": "test test",
"contact_phone": "431234567891",
"contact_phone_phoneCode": "91",
"countryName": "India",
"contact_email": "[email protected]",
"prescriptioncheck": "on",
"pick_firstname": "test test",
"pick_lastname": "test test",
"pick_email": "[email protected]",
"pick_country": "India",
"pick_state": "Madhya Pradesh",
"pick_city": "test test",
"pick_street": "test test",
"pick_street2": "test",
"pick_pincode": "123456",
"pick_mobile": "1234567891",
"pick_mobile_phoneCode": "91",
"package_boxes": "1",
"package_weight": "0.5",
"height": "1",
"width": "1",
"depth": "1",
"item_type": ["7", "7"],
"package_name": ["item 1", "item 2"],
"package_quantity": ["1", "1"],
"package_price": ["500", "500"],
"package_total_price": "500",
"prescription": ["base64 image code"],
"bill": ["base64 image code"],
"image": ["base64 image code", "base 64 image code"],
"address_id": "366",
"pay_from_wallet": "yes"
}
The screen will be look like this:

3. Hit the execute button and you will have your output like this:
{
"status": "successful operation",
"orders": {
"order_id": "IS087
4",
"prescription": "uploads/image/6284ed5a11f75.jpeg",
"bill": "uploads/image/6284ed5a12c04.jpeg",
"user_id": 1043,
"warehouse_id": 2,
"status": "Pending",
"type": "InternationalShippment",
"notes": null,
"address_id": 366,
"pickup_address": 391,
"deliveryAddress": "{\"first_name\":\"test\",\"last_name\":\"test\",\"primary_phone\":\"1234567981\",\"street_address
\":\"test\",\"street2\":null,\"gate_code\":\"test\",\"city\":\"test\",\"state\":\"test\",\"country\":\"Austria\",\"pi
n\":\"123465\"}",
"boxes": "1",
"weight": "0.5",
"height": "1",
"width": "1",
"depth": "1",
"pay_from_wallet": "yes",
"updated_at": "2022-05-18 12:58:02",
"created_at": "2022-05-18 12:58:02",
"id": 874
},
"items": {
"item_type_id": "7",
"name": "item 2",
"user_id": 1043,
"item_id": "ITM1407",
"order_id": 874,
"price": "500",
"height": "1",
"width": "1",
"depth": "1",
"quantity": "1",
"updated_at": "2022-05-18 12:58:02",
"created_at": "2022-05-18 12:58:02",
"id": 1407
}
}
Payment :
1. For payment of api orders, if you give input pay_from_wallet to yes and your wallet has payment equals to or greater than total amount than when admin sent payment from admin side your payment will automatically deducted on the time of payment sent.
2. Your api key should be in live mode for this.
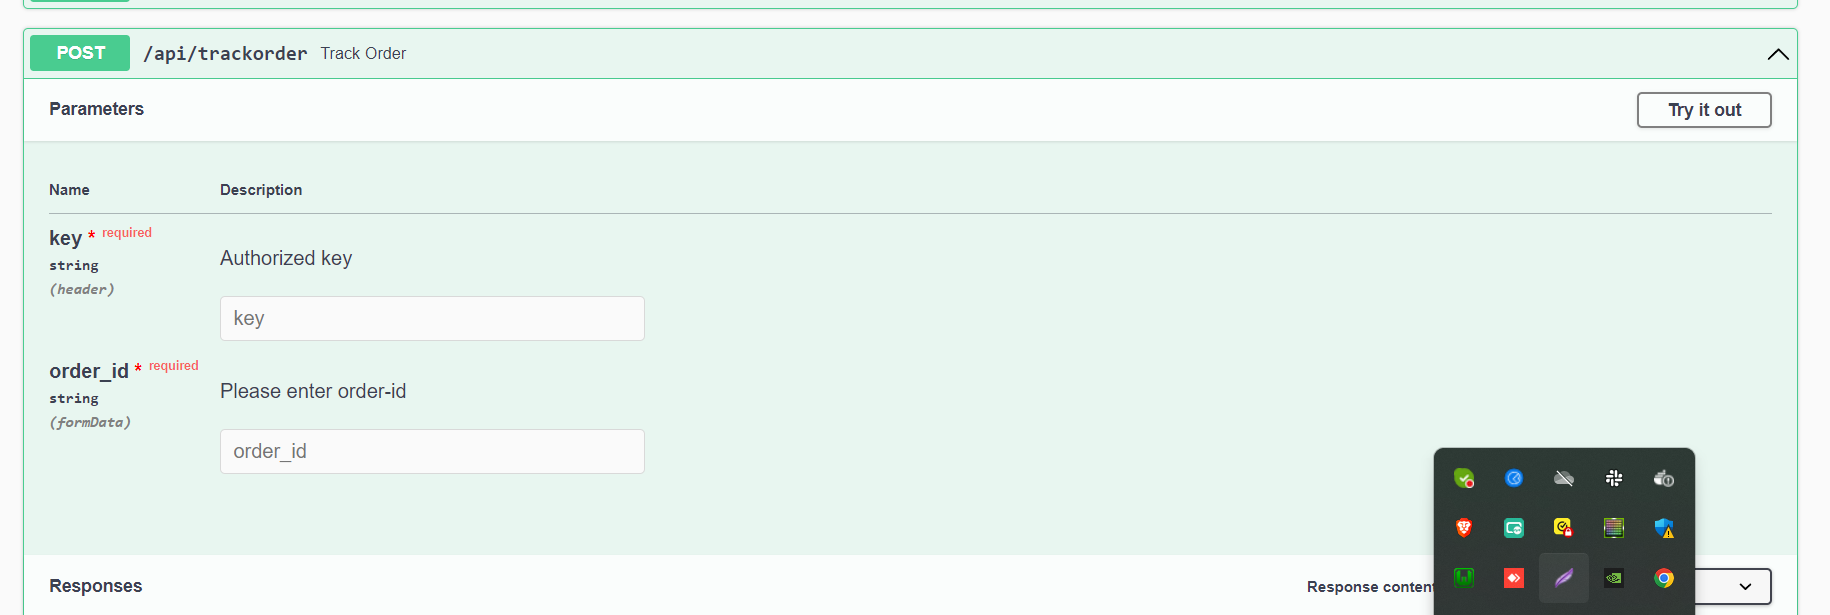
4. Order Status Api:
Fetch order status, Add a valid Order id.
Example Input :
{
"order_id": "SNS0001",
}
The screen will be look like this:
3. Hit the execute button and you will have your output like this:
{
"shipping_status": {
"OrderArrived": {
"status": false
},
"ShippingCreated": {
"status": false
},
"Shipped": {
"status": true,
"trackingURL": "https://www.dhl.com/in-en/home/tracking/tracking-express.html?submit=1&tracking-id=2385568511"
},
"InTransit": {
"status": false,
"trackingURL": "https://www.dhl.com/in-en/home/tracking/tracking-express.html?submit=1&tracking-id=2385568511"
},
"Delivered": {
"status": false,
"trackingURL": "https://www.dhl.com/in-en/home/tracking/tracking-express.html?submit=1&tracking-id=2385568511"
}
},
"order": {
"user_id": "1166",
"order_id": "SNS0116",
"status": "Accepted",
"type": shopNship,
"notes": "test",
"deliveryAddress":{
"first_name": "test",
"last_name": "test",
"primary_phone": "123456789",
"street_address": "test",
"street2": "test",
"gate_code": "test",
"city": "test",
"state": "test",
"country": "test",
"pin": "test",
}
"assested_payment_status": "NotCreated",
"payment_status": NotCreated,
"created_at": 2023-05-16T16:36:17.000000Z,
},
}